¶ Spring Security integrated Authing CAS Start quickly
This article uses Spring Security 5 for authentication and access control in Spring ecology as an example, and details Spring Security 5 How to Access Authing CAS Spring Security is a Security framework for secure access control solutions. It provides a set of available Spring application in context Bean, Make full use Spring IOC(Control reverse)、DI(Dependency injection)and AOP(Stem programming)function,Application system Provide a stateless security access control function,Enhanced business System security, and reduce write a lot repeat code.
Spring Security the main features mainly include:
- Certification
- Authorize
- Attack protection
¶ Integration introduction
sign in (Single Sign On), English name abbreviation SSO,SSO It means that in multi-system environment, you can log in to the unilateral system Don't log in again in the case of accessing related trusted systems. Means of Just log in once the monomer system can be.
Authing CAS is SSO Solution Implementation method, that is, in multiple systems, users can access any of these systems only need to be logged in to a central server. One, no need to log in multiple times. And Support multiple certification mechanisms、security strategy、Support authorization and Provide high availability methods. No need to pay attention to how to implement CAS Server、Configure HTTPS and provide personalized login, logout pages, and more.
Authing Simplified configuration process,Providing one-stop application integration for users, users only need to configure various needs in the platform.
The following is an example of the CAS service provided by Authing, Will detail the method of using Spring Security 5 integrated Authing Cas single sign-on login.
- development tools: IDEA
- Project Management Tool: Maven
- JDK Version: 1.8
- Version Control Tool: Git
¶ Configure Authing
¶ Obtain Authing Platform information
First, you must register an account at Authing and enter the console, and create a user pool according to the boot step.
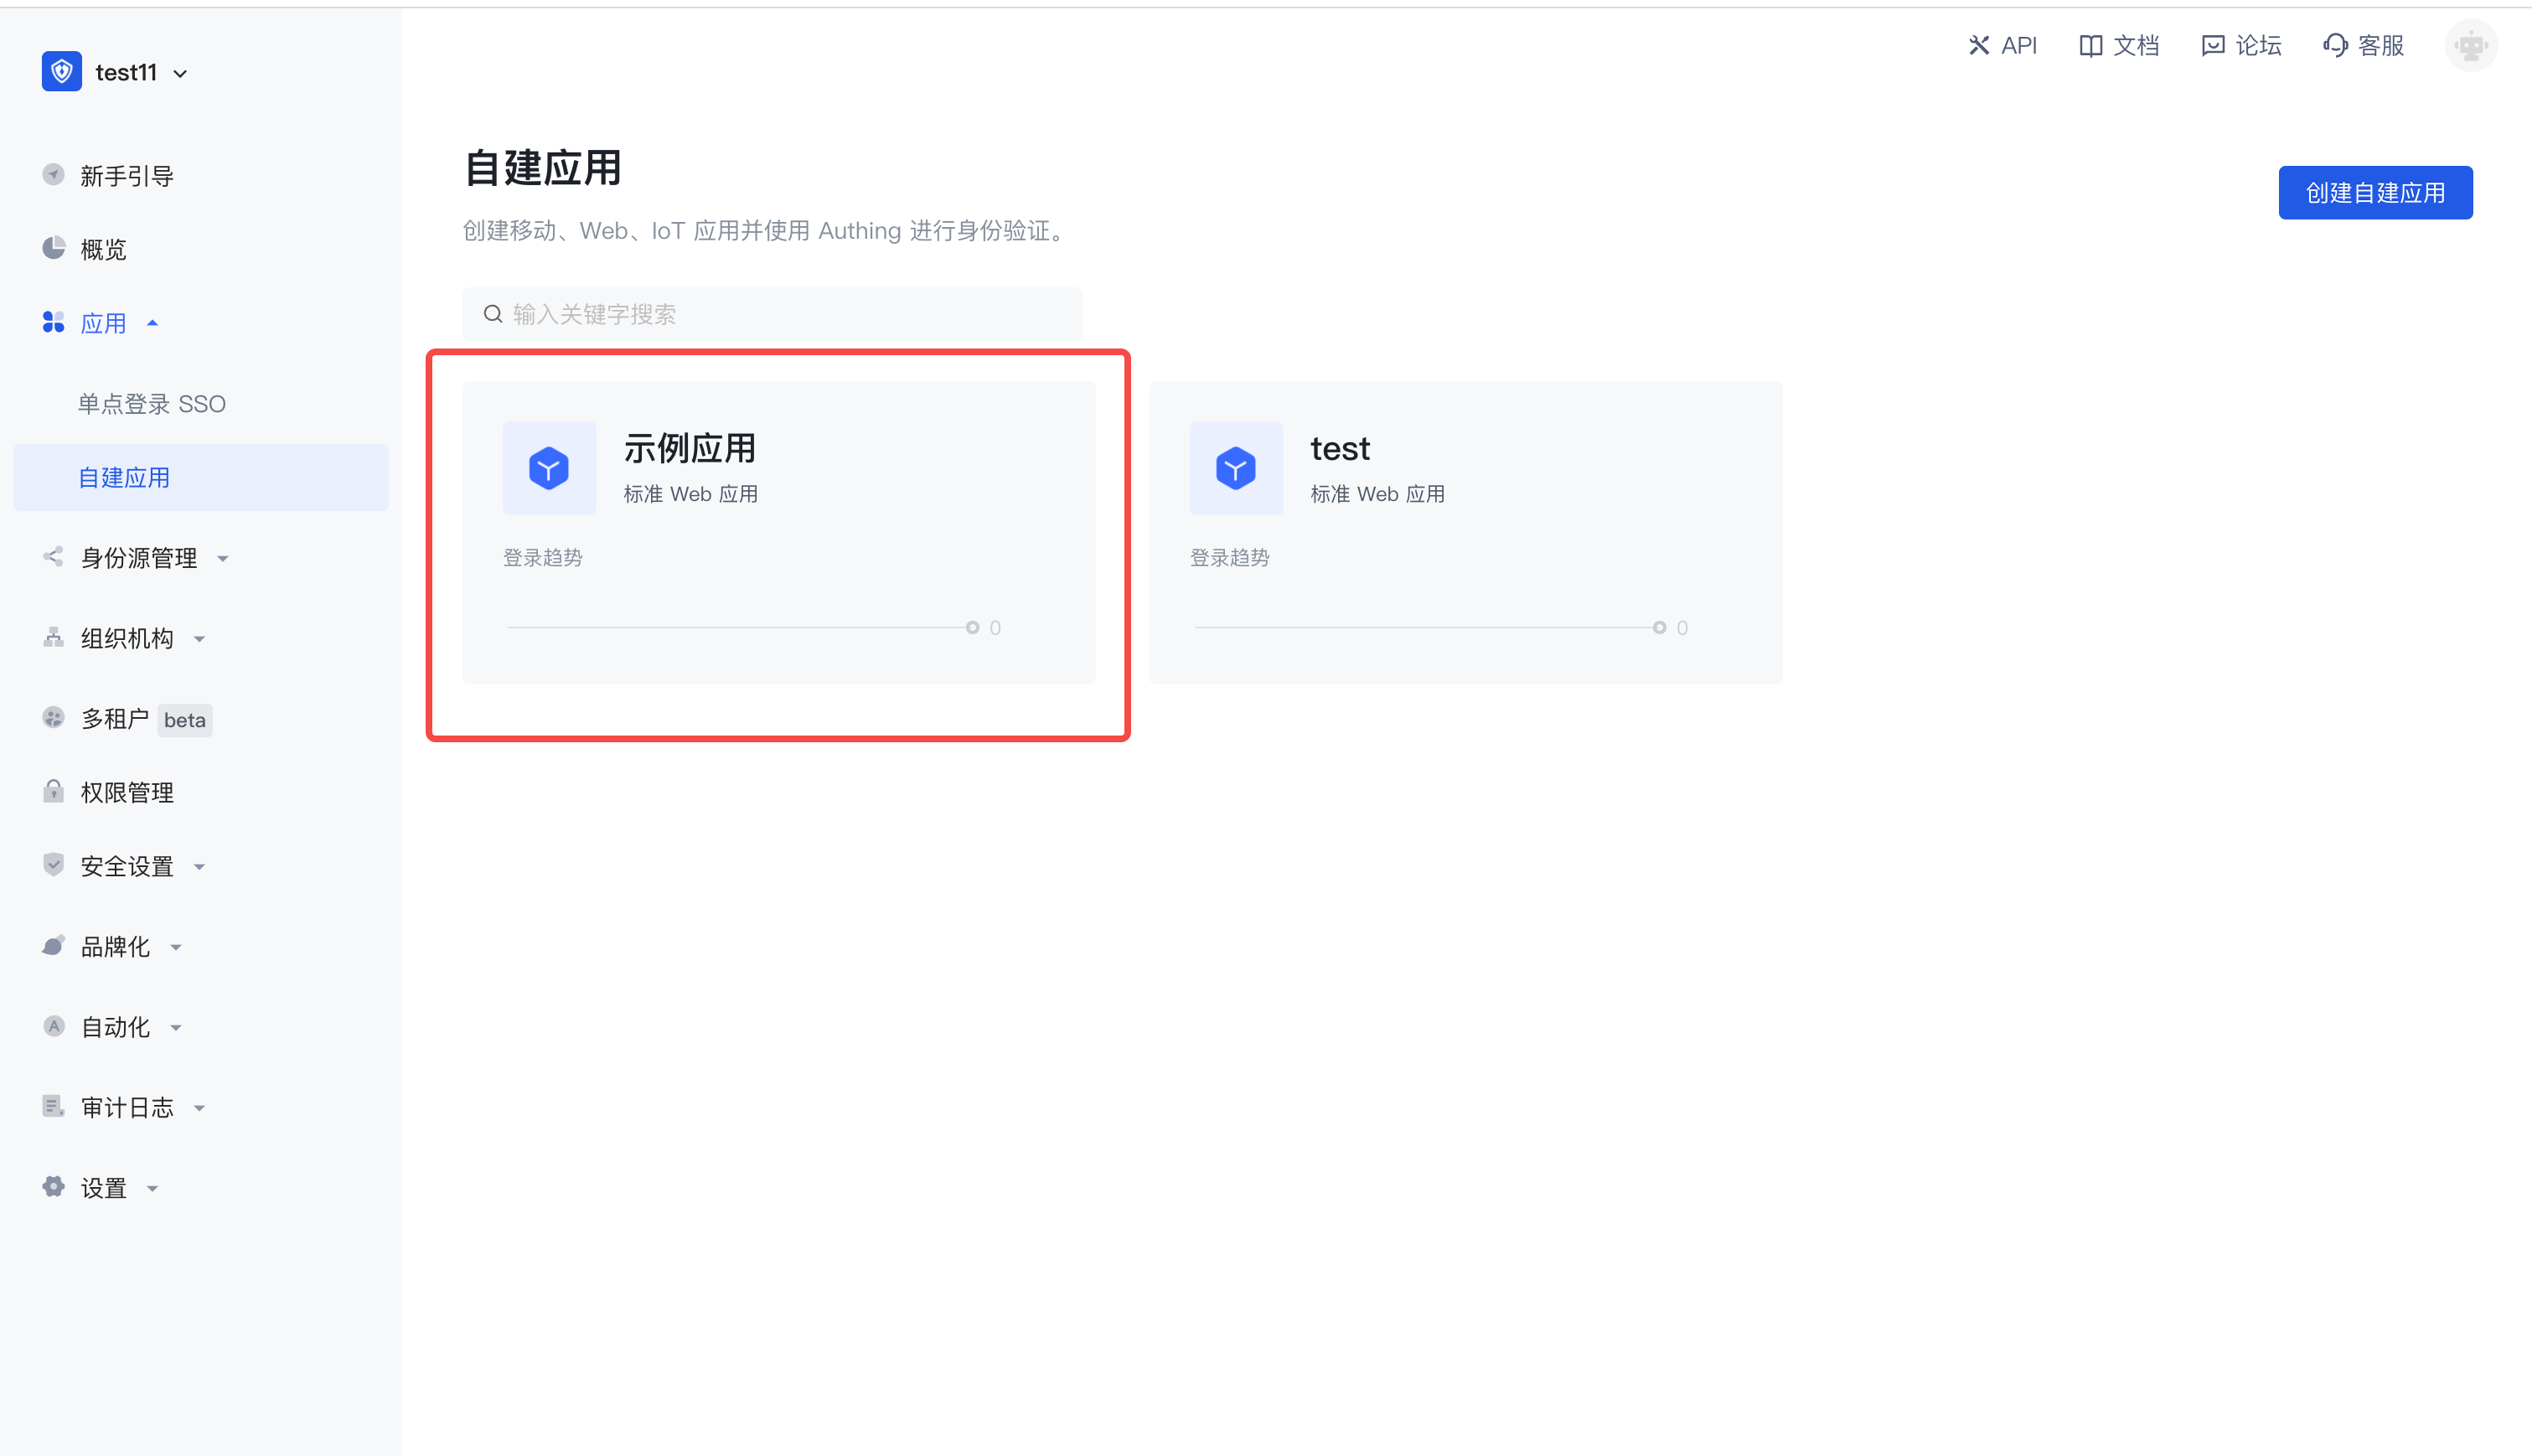
Click on the "Application" menu item on the left, you will see a default creation application on the right.

Click "Configuration" to find the authentication configuration under the application page and configure your login callback URL and change the default protocol type to CAS.

Configure the above, continue to configure, you will see more identity protocols, click to expand.

Enter more identity protocol details page, switch to the CAS identity provider, enable the CAS IdP, log in to the endpoint, log up the endpoint, the service ticket check endpoint (CAS 2.0) address,
This information needs to be used later.

¶ Project construction
¶ Quick build project
Open IDEA, click New Project,select Spring Initializr create Spring Boot project,Input project Group and Artifact information.

In the integration process, some other dependent packages are added to pom.xml, as follows:
<dependencies> <dependency> <groupId>org.springframework.boot</groupId> <artifactId>spring-boot-starter-web</artifactId> </dependency> <dependency> <groupId>org.springframework.boot</groupId> <artifactId>spring-boot-starter-tomcat</artifactId> </dependency> <dependency> <groupId>net.unicon.cas</groupId> <artifactId>cas-client-autoconfig-support</artifactId> <version>2.3.0-GA</version> </dependency> <!--Remote call interface--> <dependency> <groupId>cn.hutool</groupId> <artifactId>hutool-all</artifactId> <version>5.7.11</version> </dependency> </dependencies>复制成功
Where the hutool toolkit is the remote call interface. When the callback request is received, the CAS Service Ticket's serviceValidate interface is used to verify the legality of the endpoint, and the subsequent automatic callback interface encoding will be used.
Finally, you need to add @EnableCasClient annotations in the startup class to enable the CAS client, as follows:
@SpringBootApplication(exclude = DataSourceAutoConfiguration.class) @EnableCasClient public class AuthingCasApplication { public static void main(String[] args) { SpringApplication.run(AuthingCasApplication.class, args); } }复制成功
¶ Configure the configuration file in the project
find src/main/resources/application.properties, rename it as application.yml, And add the following:
server: port: 9999 cas: server-url-prefix: {Replace with you server-url-prefix,such as:https://cjtjls-demo.authing.cn/cas-idp/61319680ea8b30c9ca9ca071} server-login-url: {Replace with you server-url-prefix,such as:https://cjtjls-demo.authing.cn/cas-idp/61319680ea8b30c9ca9ca071/login} client-host-url: {Replace with you client-host-url,such as:http://localhost:9999/} validation-url-patterns: - /**复制成功
Need to {server-url-prefix}、{server-login-url}、{client-host-url} replace the actual information in the previous application configuration
¶ Automatic callback interface encoding
Create a new one under the project package, Then create a new one CallBackController, this interface is passed CAS ticket get user information.
Note that the following parameters, ticket is the standard of Authing CAS, which is not changed, which is also the provisions of the standard protocol. The value corresponding to the service parameter is the previously configured by the Authing platform application.
package com.authing.cas.authingcas.controller; import cn.hutool.http.HttpUtil; import org.springframework.http.MediaType; import org.springframework.stereotype.Controller; import org.springframework.web.bind.annotation.GetMapping; import org.springframework.web.bind.annotation.ResponseBody; import java.util.HashMap; @Controller public class CallbackController { @GetMapping(value = "/", produces = MediaType.APPLICATION_XML_VALUE) @ResponseBody public String getTicket(String ticket) { HashMap<String, Object> paramMap = new HashMap<>(); paramMap.put("service", "http://localhost:9999/"); paramMap.put("ticket", ticket); String result = HttpUtil.get("https://cjtjls-demo.authing.cn/cas-idp/61319680ea8b30c9ca9ca071/serviceValidate", paramMap); return result; } }复制成功
¶ Test items
Everything is ready, start the project and visit http://localhost:9999, You can see the Authing login window

Next, you can enter the username, password to log in, check the result after login

<cas:serviceResponse xmlns:cas="http://www.yale.edu/tp/cas"> <cas:authenticationSuccess> <cas:user>username</cas:user> <cas:attributes> <cas:authenticationDate>2021-07-20T10:04:14.044Z</cas:authenticationDate> <cas:longTermAuthenticationRequestTokenUsed>false</cas:longTermAuthenticationRequestTokenUsed> <cas:updated_at/> <cas:address> <cas:locality/> <cas:street_address/> </cas:address> <cas:phone_number_verified>false</cas:phone_number_verified> <cas:gender>U</cas:gender> <cas:email_verified>false</cas:email_verified> <cas:picture>https://files.authing.co/authing-console/default-user-avatar.png</cas:picture> <cas:sub>60a5e57cfaa50e4850dd12b0</cas:sub> </cas:attributes> </cas:authenticationSuccess> </cas:serviceResponse>复制成功
In addition, Authing also saves the user's login state, and the user has no authentication in a short time. Also, if the ticket verification fails, Authing will return the XML documentation below the format.
<cas:serviceResponse xmlns:cas="http://www.yale.edu/tp/cas"> <cas:authenticationFailure code="INVALID_TICKET">Ticket 不存在</cas:authenticationFailure> </cas:serviceResponse>复制成功
Congratulations 🎉🎉🎉 , you have learned Spring Security 5 integrated Authing CAS certified
¶ Other knowledge learning
¶ What is a single sign-on?
Single Sign On:Single Sign On, abbreviation SSO,SSO make it in multiple applications, users only need to log in to access all mutual trust applications.
¶ What is CAS
CAS frame:CAS(Central Authentication Service)is a framework that implements SSO single sign-on.
¶ CAS the term
Ticket Granting ticket (TGT) : Can think that it is CAS Server a ticket generated according to the username password,save Server port
Ticket-granting cookie (TGC) :In fact, it is a Cookie,store user identity information,send the Client from Server
Service ticket (ST) :One sexual ticket generated by TGT for verification, only once. Equivalent to the Server to send a ticket, then Client take this ticket and come back. Server Verify, see if it is Server Issued
¶ Next you may need
Use Spring Security integrated OAuth 2.0
Spring Security integrated Authing OAuth 2.0 Start quicklyExpress Learn
Express integrated OIDC Single sign-in guideUse Spring Security integrated OIDC
Spring Security integrated Authing OIDC Start quickly