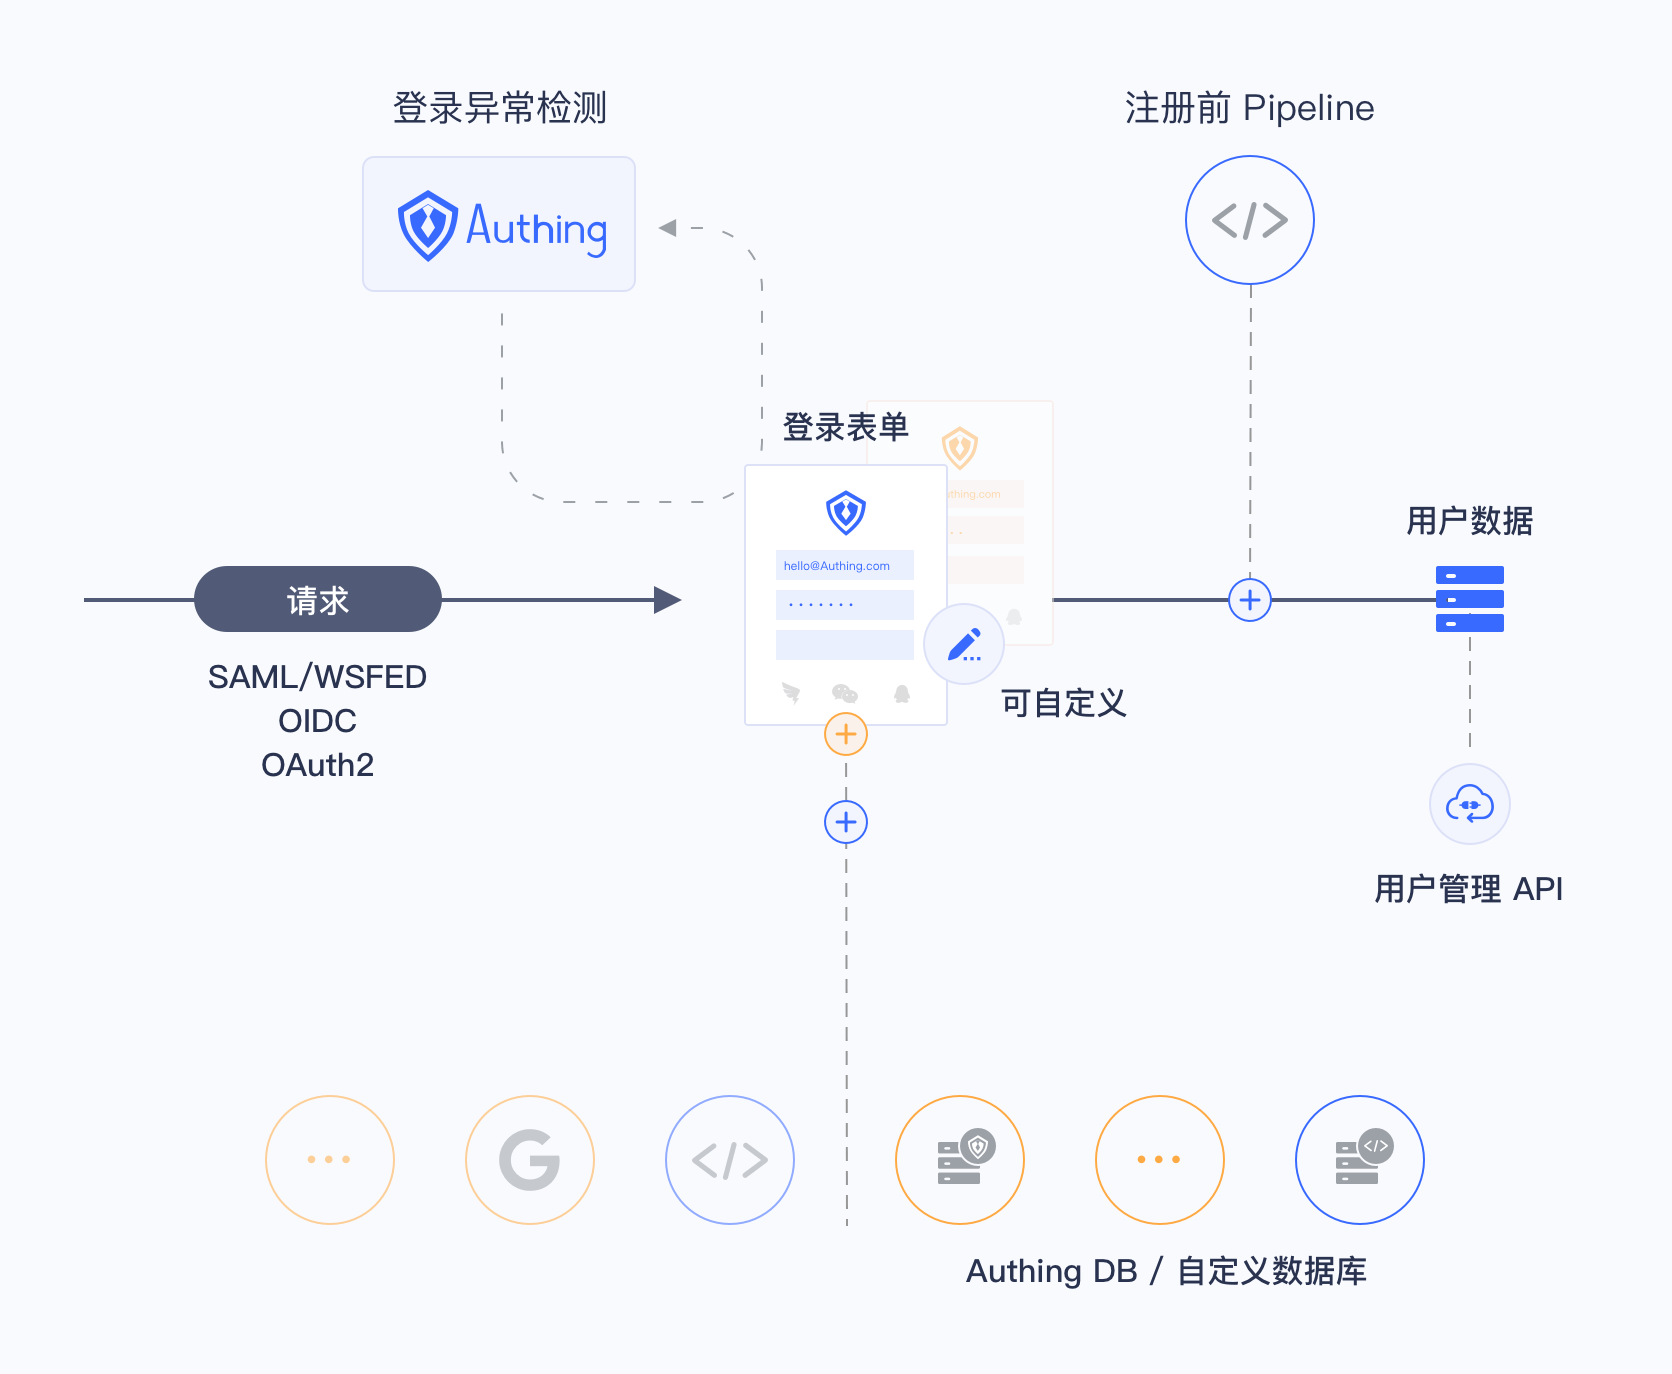
¶ Overview of Integrating Customized Databases
Using customized databases can satisfy these use cases:
- Use your own databases to store user information: You can use your own database to store user information. In this mode, Authing won't store any user information.
- Migrate user information to Authing with lazy migration: In lazy migration mode, all user information will be stored in your database at the beginning. When a user try to login through Authing, the Authing will search and authenticate the user in the database with customized script and will migrate this user to Authing if authenticate succeeds. When this user login Authing at the second time, he/she will be authenticated with Authing's database. After all users in your database at least login to Authing for one time, the migration is completed. More details can be found in document of achieving lazy migration with customized database.
You can setup customized databases with these methods: Go to the Authing Console (opens new window) then find Connect IdP - Customized Database to setup customized database connection. More details can be found in document about how to setup customized database.

¶ How it Works
As the figure shows below, you can setup customized database and get users' identity information through Legacy Database in the Authing authentication flow. The flow will be a little bit different according to different user cases.

There are two ways to setup customized database to fit different user cases:
- Migrate user information to Authing with lazy migration: In lazy migration In lazy migration mode, all user information will be stored in your database at the beginning. When a user try to login through Authing, the Authing will search and authenticate the user in the database with customized script and will migrate this user to Authing if authenticate succeeds. When this user login Authing at the second time, he/she will be authenticated with Authing's database. After all users in your database at least login to Authing for one time, the migration is completed. More details can be found in document of achieving lazy migration with customized database.
- Only use customized databases to store user information: You can use your own database to store user information. In this mode, Authing won't store any user information. However you need to deploy scripts for user management to make the system work normally.
¶ Operating Environment
The current operating environment for Authing customized database script is an isolated sandbox instance based on node 12 environment.
¶ The npm Module
The npm module has several ways to connect databases like Client, axios, bcrypt and lodash, etc.
- bcrypt (opens new window): The bcrypt can be used to encrypt and validate passwords, which is also our recommanded way to encrypt passwords and is convenient to use:
const isPasswordValid = await bcrypt.compare(password, user.password);
if (!isPasswordValid) {
  throw new Error("wrong password");
}
- axios (opens new window): The axios is the most common network request library in Node.JS.
- lodash (opens new window) v4.
- pg (opens new window): The Node PostgresQL Driver.
- mongodb (opens new window): The Node Mongodb Driver.
- mysql2 (opens new window): The Node MySQL Driver.
- mssql (opens new window): The Node Sql Server Driver.
¶ Add Authing IP Address to Your Whitelist
If the server that your script tries to access has a firewall, please add these IP addresses to its whitelist: 140.179.19.50 and 52.80.250.250. You can also get Authing external IP address from this API: https://core.authing.cn/api/v2/system/public-ips (opens new window).