¶ Configure Authing as a CAS IdP
This article introduces how to configure Authing as a CAS IdP. By this way, Authing can be integrated by other system as a IdP with CAS protocol.
Authing now has achieved three CAS 1.0 endpoints: /login, /validate and /logout.
You can learn more details about CAS protocol at here (opens new window).
¶ Create an Application
You need to create an application in Authing and enable it to authenticate. Go to Console > Application > Application List and then click "Create a new application". You can use your project name as the name of the application.
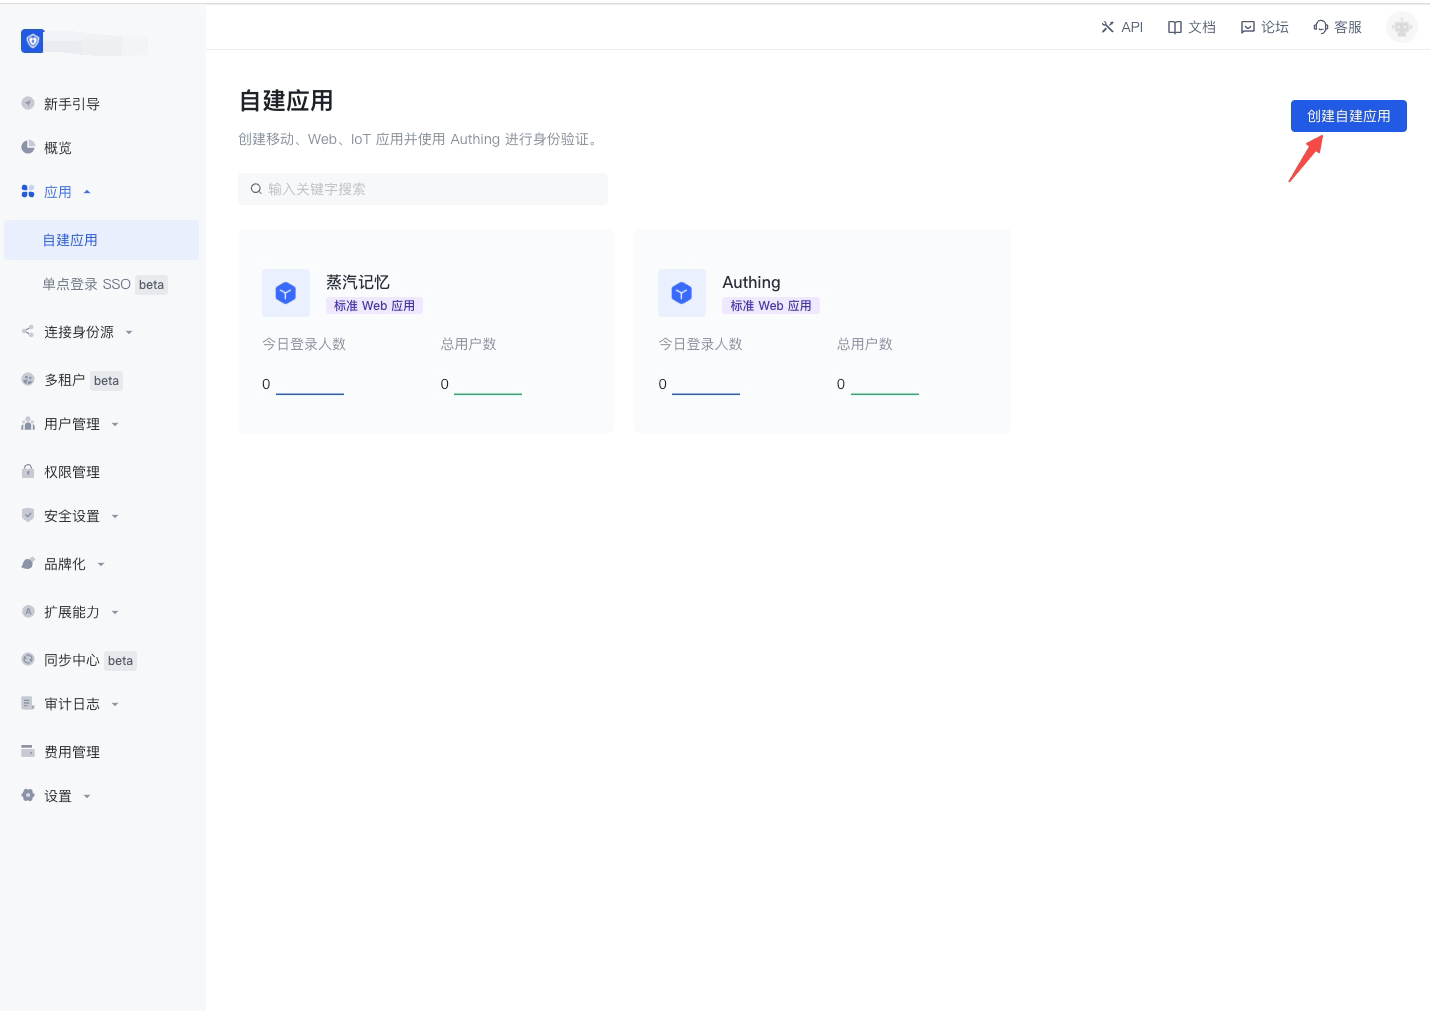
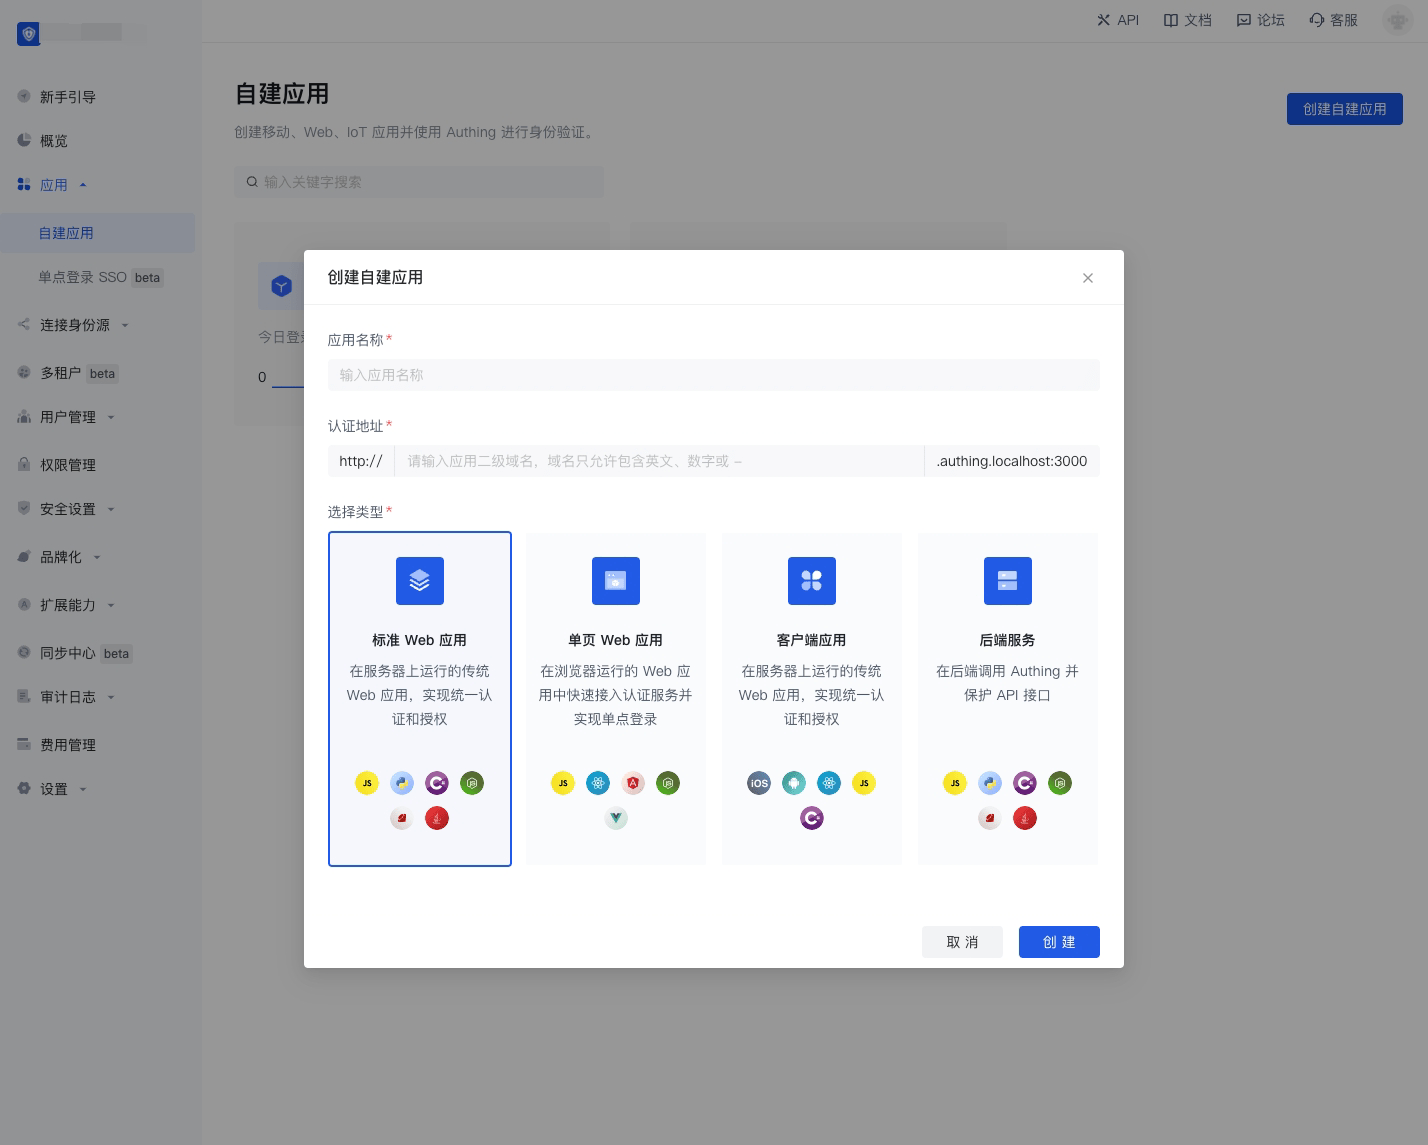
After that you need to set up your Application Name, such as "Network Note Project". Then you will create an Authentication URL which will be used for the auhtencation of your users. The Callback URL is the Backend Routing of your project. Authing will send Tickets to this address. After you finished all configuration, click "Create".
Find your application, and go to the "Enable Identity Provider" tag.
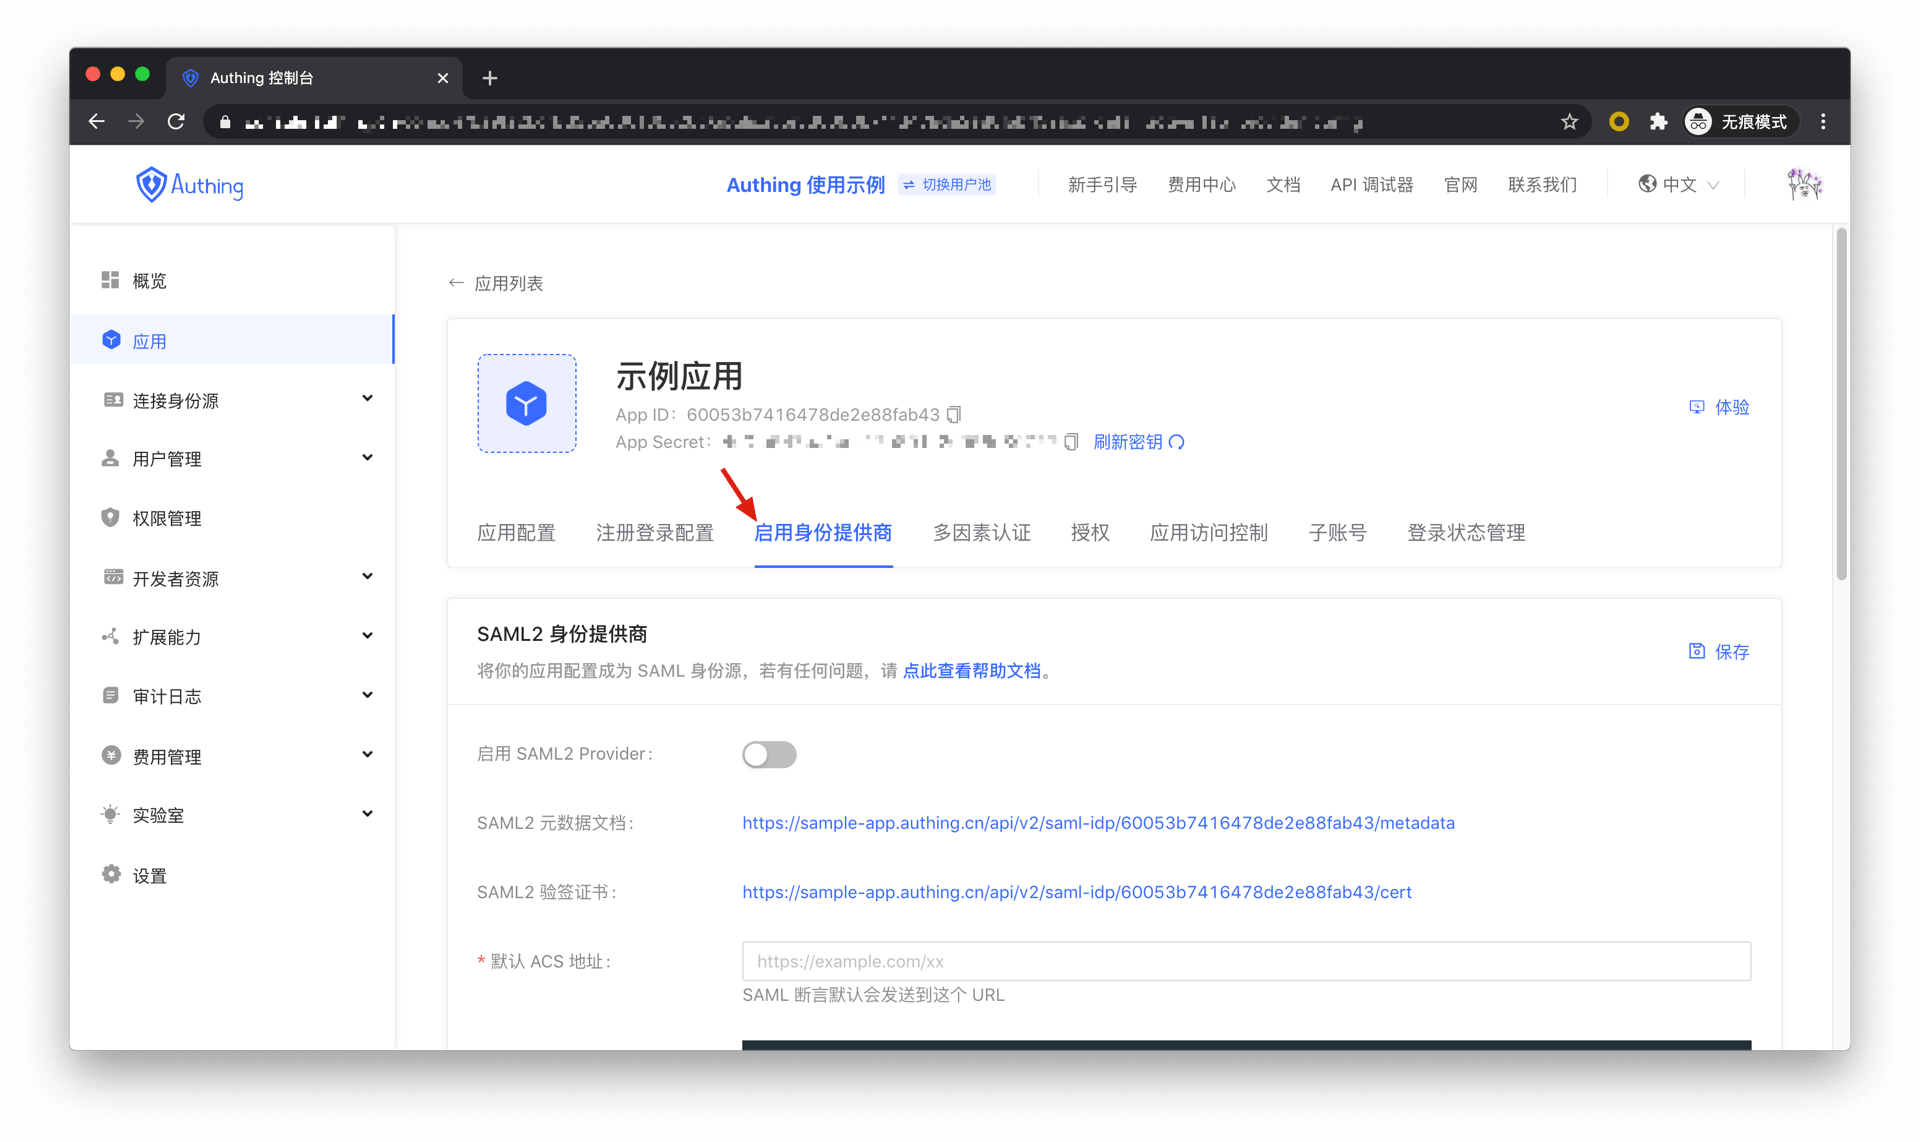
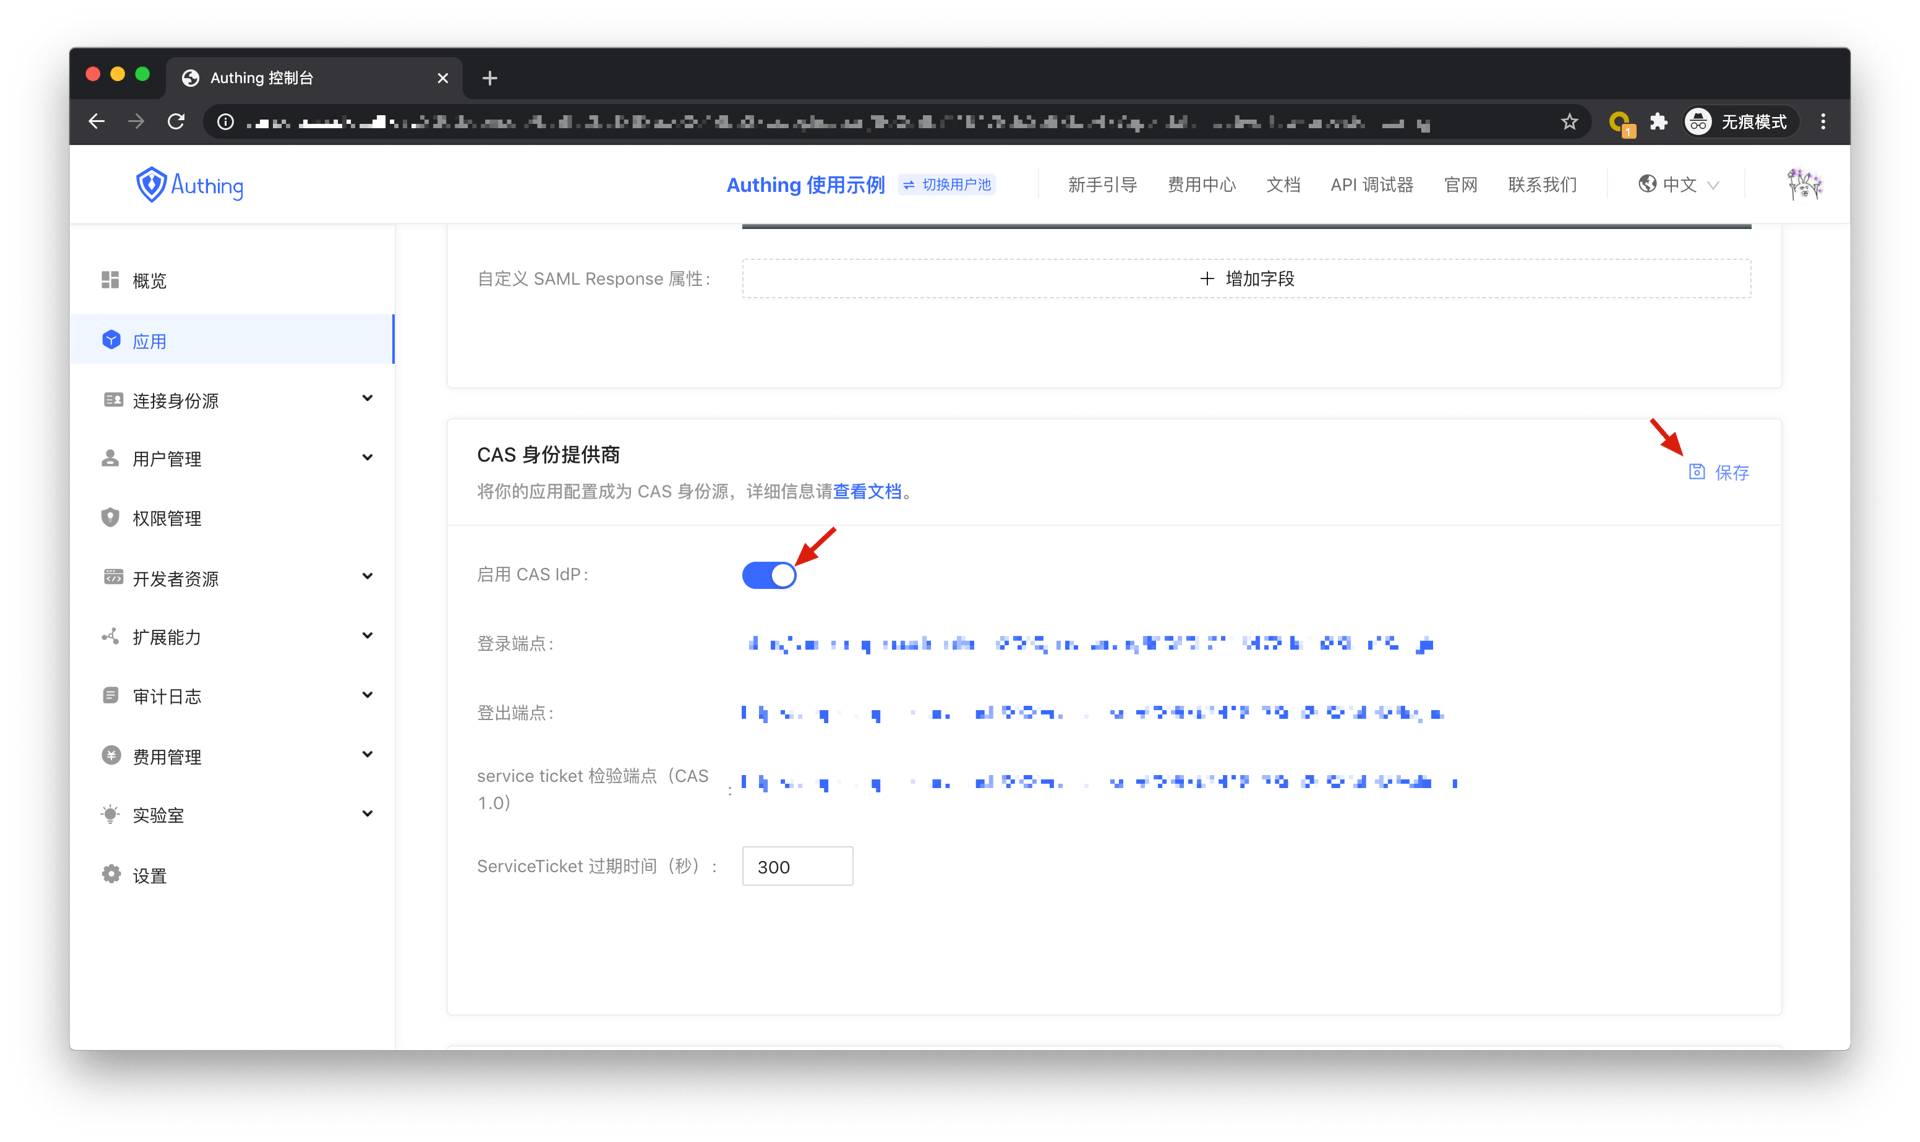
In the "CAS Identity Provider" tag, enable the CAS IdP and save the settings.。
¶ Web flow
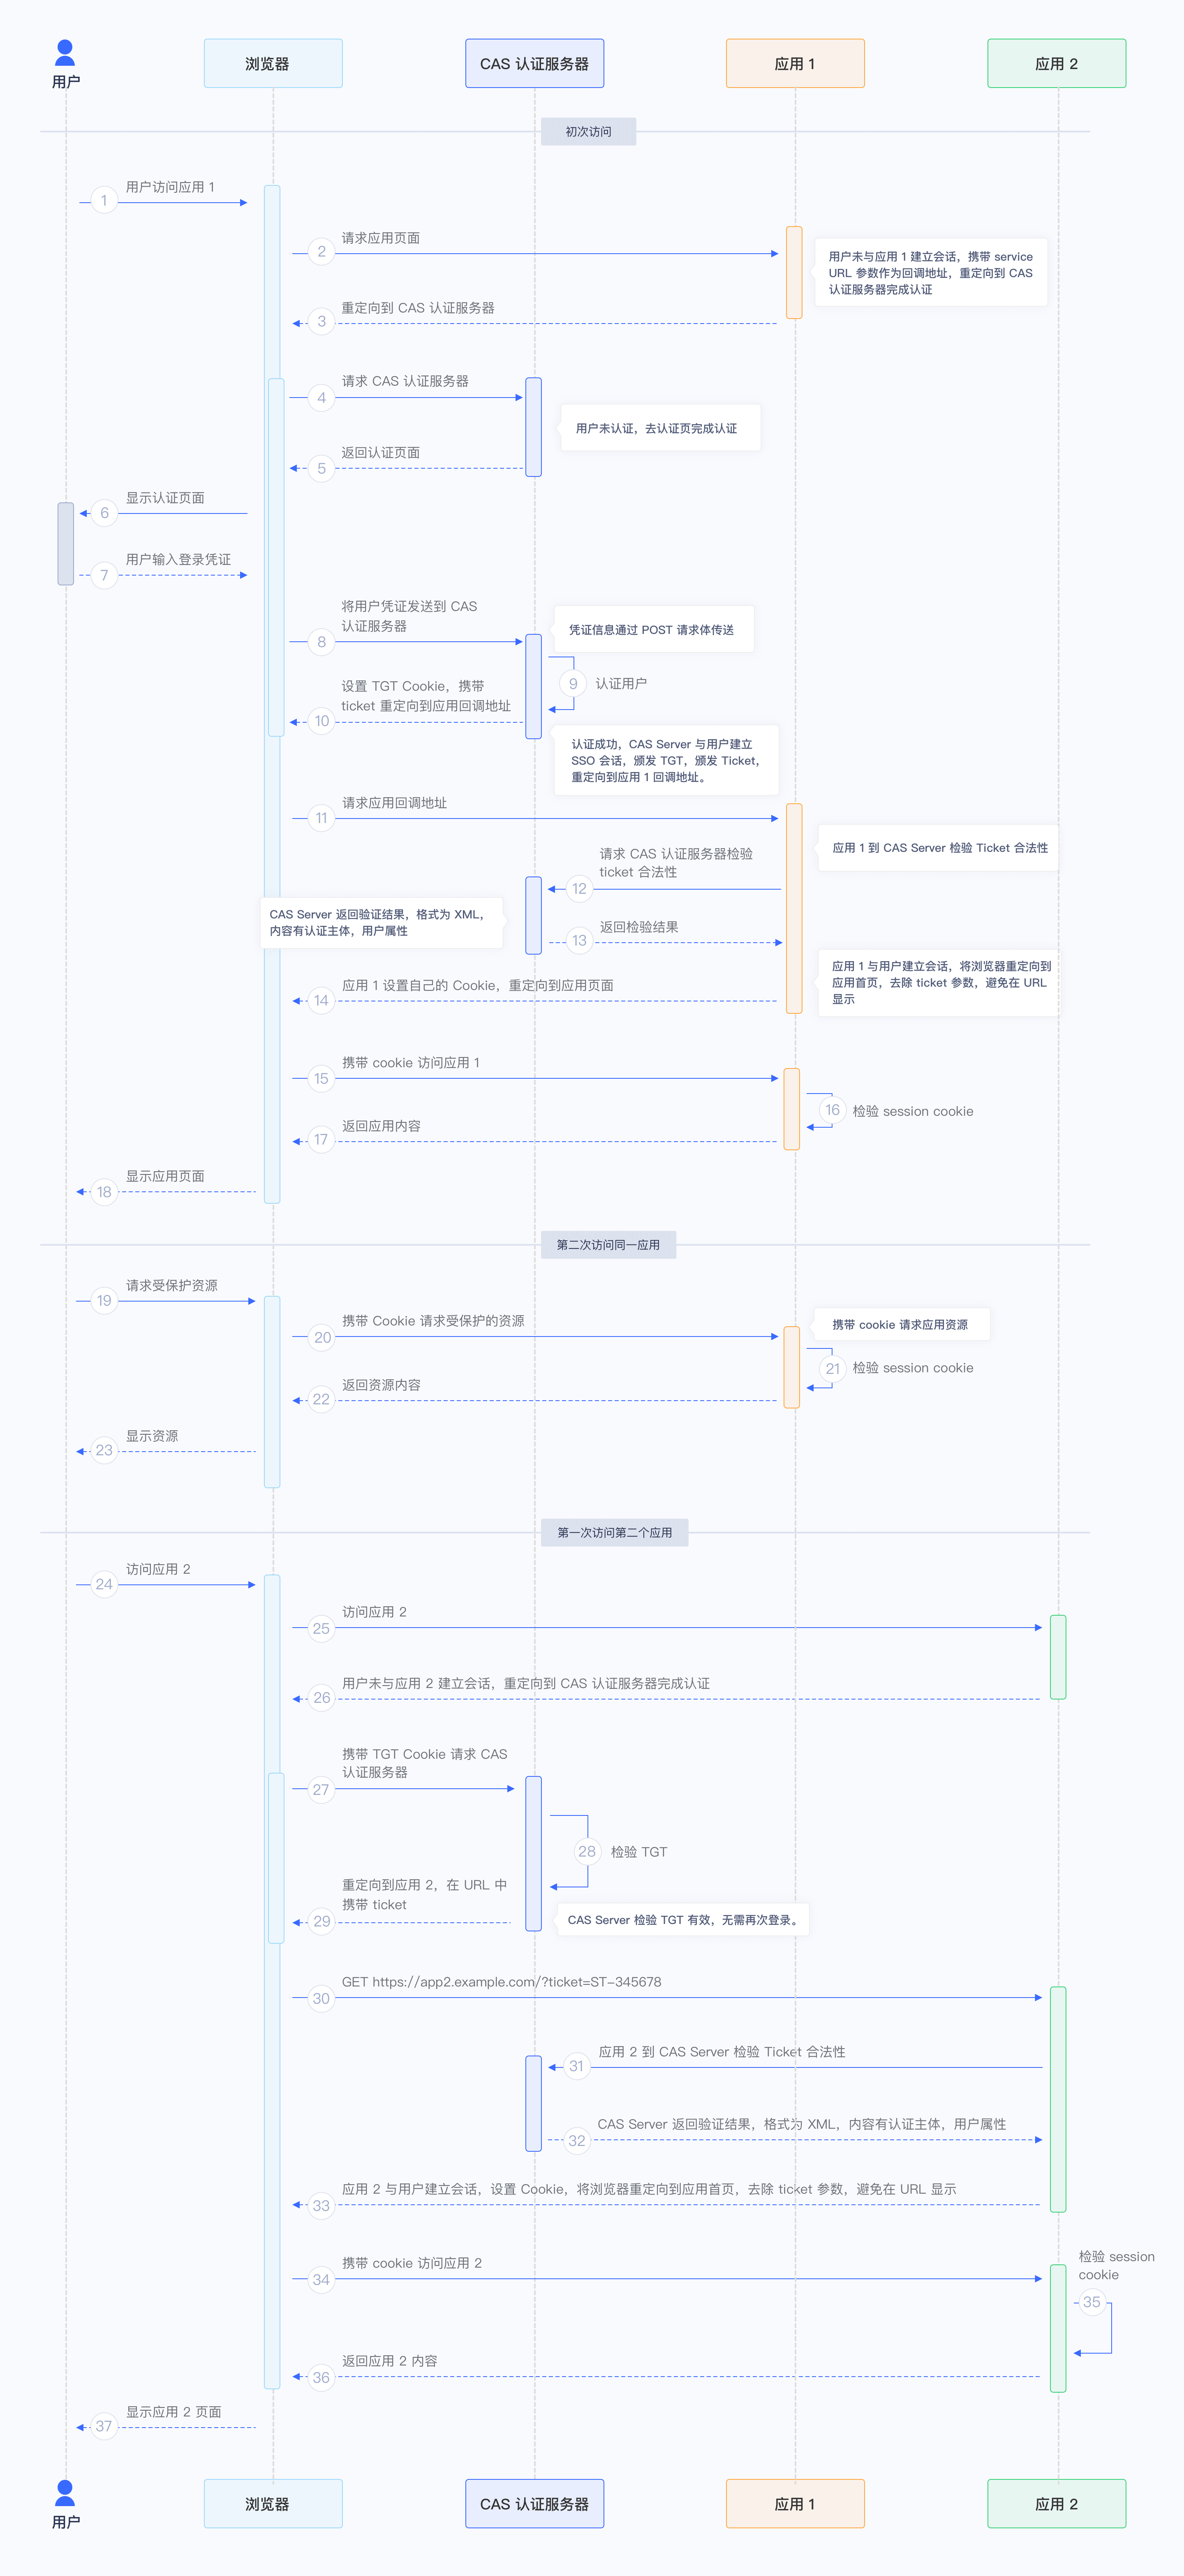
Here is the web flow:
- The user accesses App1 for the first time.
- Because the conversation between user and App1 has not been established, the user will be redirect to authentication URL.
- Because the user has not been authenticated yet. He/she will complete the authentcation at CAS Server.
- The user will be redirected to the callback URL of App1 with the Ticket.
- App1 then will validate the Ticket with CAS Server.
- App1 establishes the conversation with the user and returns the protected resources.
- Then the user tries to access App2 for the first time.
- Because the conversation between user and App2 has not been established, the user will be redirect to authentication URL.
- The CAS Server finds the user has been authenticated, so it will redirect user to the callback URL of App2 with the Ticket.
- App2 then will validate the Ticket with CAS Server.
- App2 establishes the conversation with the user and returns the protected resources.
Here is the flow chart:
Here is the integration document with more details.